Showing posts with label home decorating. Show all posts

Wednesday, December 26, 2012

Kitchen Color Change


Before

I have always loved the color red, so much so that not long after moving into our home I painted the kitchen red.  You can see what it looked like in the picture above taken this summer at my sons birthday party.  Sorry guys, you where in the best picture I had of my kitchen before I changed the colors.  It looks fairly bright in this picture because it was a nice sunny day, but on days that the sun didn't shine, it was very dark and cavernous.  I also love the blue color that is not quite powder blue, not quite turqoise, not quite robin's egg blue, I guess it most closely resembles Tiffany box blue.  It is accented nicely by my ever favorite color red.  I made the curtains you see in the background of the above picture and was inspired to change the wall color of my kitchen.
After

I love how it turned out.  I ended up adding ric rac to the curtains (you can see it on the one on the left).  I had to purchase another roll to finish the other curtain.  Ric rac and polka dots are alot another passion I have, you can see the hand towel I made on the oven door from polka dot material.  I will show you how I made the hand towel soon.  I have one thing I want to change and that is the space between the cabinet top and the upper cabinets.  It shows every little splatter and doesn't clean up well.  I would like to put metal, tile, or something back there that will clean up nicely.  Thanks for stopping by!  Have a wonderful, blessed day.

Renee

Monday, February 13, 2012

Lodge Look Pillow

This weekend was my brother's birthday.  I have a wonderful brother.  He is a great man who is kind to all, family, friends, and strangers.  He is one of a kind.  He takes care of everybody.  So when my sister-in-law said she wanted to throw him a surprise birthday party, I thought it was a wonderful idea.  But what do you get a guy who has very few needs or and even fewer wants?  He loves to hunt, always has, and when he and his wife first married I made them Christmas stockings, one with a buck for him and one with a doe for her.  So when I started searching the Internet for something to give him I knew this would be perfect for him.  His living room is decorated in a lodge theme with some of his prized deer heads mounted and hanging for all to see.  I found my inspiration here.  This lovely lady  from Sew Homegrown was inspired by this pillow from Anthropology.
She had her husband draw a pattern and she made this beautiful pillow:
She has graciously shared the pattern on her blog so all of us to use.   There is also a wonderful step by step tutorial to guide you through the entire process.
It is amazing how changing the fabrics and colors gives you a totally different look.  I went to my local quilt store and chose two complementary fat quarters that went with the colors in my brothers living room.
I used a contrasting color for the back and added one of my labels.  I loved how it turned out.  Needless to say my brother was very happy with it.  His wife has requested the matching doe for her birthday.  I told her the doe would be so much easier because you would just cut the antlers off, the hardest part to sew.  Be sure and tell Jessica I sent you when you visit her blog.  Happy sewing

I am linking here:  The Shady Porch, 3 Mango Seeds

Sunday, February 5, 2012

Valentine Mantle

I have never been one who did a lot of decorating for the holidays.  I guess I found it a little intimidating.  Thanks to Pinterest, I am no longer intimidated.  I have been inspired.  Pinterest has shown me that I can take the things I already own and put them together with some things I create (cheaply) and make something I can be proud of.  The mantle in the picture above was created by using 4 items I keep on it all the time, the red topiary, the mirror, the candle stick, and the FAMILY cutout andadding red candles that I already had for Christmas, a silk rose I had in the cabinet, a simple construction paper heart garland, and a Valentine printable I found here and placed in a frame I already had.  So I spent $0.  I am already planning what I want to do for Easter.  I have been scouring Pinterest for ideas. 
Thanks for stopping by.  I hope you will come back later in the week to check out the preschool activities I will be hosting for Valentine's Day themes.  I am sure you will find something you can do with your preschooler. 
Until Next Time
Ephisians 1:16

Thursday, January 12, 2012

Repurposing an Old Window


In a past post I told you about redecorating my living room.  This has been an on going project.  I am very particular and get these ideas of what I want and won't settle for anything less than what I want.  That said, I still have a very large bare wall in my living room because I have not been able to find that one thing that makes me completely happy.  On a small wall I made a piece to hang.  I had an old window in the basement from a house we used to live in.  I absolutely love old windows.  I have been waiting for years to do something with this window.  So this was going to be the day that I finally did something with that old window. 
I started by adding hangers to my old window.  These I purchased at Wal-Mart.  They could also be purchased at a hardware store.  I don't remember exactly how much I paid for them, but I can promise you it wasn't a lot because my decorating budget slim to none.  They need to be placed evenly.  I used the panes in the window as my guide of where to place place them.  Then use just a screw driver to secure them.

This is the Martha Stewart Circle Cutter.  I purchased it several years ago at Micheal's.  I do remember I had a coupon so it was half off the regular price, but not real sure what that was, but would guess less than $10.  I used the circle cutter to cut circles out of turquoise, brown, and cream colored scrapbook paper.  One tip, I learned this the hard way, cut the inner circle first then the outer one or your cutter will not be resting on the paper and your circle will move making it impossible to cut the inner circle.
I placed the circles on the window where I wanted them.  Some of them I cut in half and rested along the edge of the pane.

I coated the window with Modge Podge (I make my own, you can see it in the corner of the picture.  I found the recipe on Pinterest).  Then place the circles back where I had them.

Coat the entire window with a nice layer of Modge Podge.  Be careful not to get the paper too wet because it will ripple.  You can see a couple of my circles did ripple.  If the do, just keep pressing them down with your Modge Podge applicator.

After the window was finished, I went a head and hung it on the wall.  I needed to put it somewhere to dry out of the way and this seemed like the best idea to me.

This is the finished project.  What do you think?  I am happy with it.  I would like to accent it with some smaller items.  I am thinking maybe some letters from our names, or spelling out the word FAMILY or WELCOME and painting it in coordinating colors.  I am open to suggestions. If you have an idea for something that would compliment my window, please share!!!

Y'all come back!
Renee

Friday, December 30, 2011

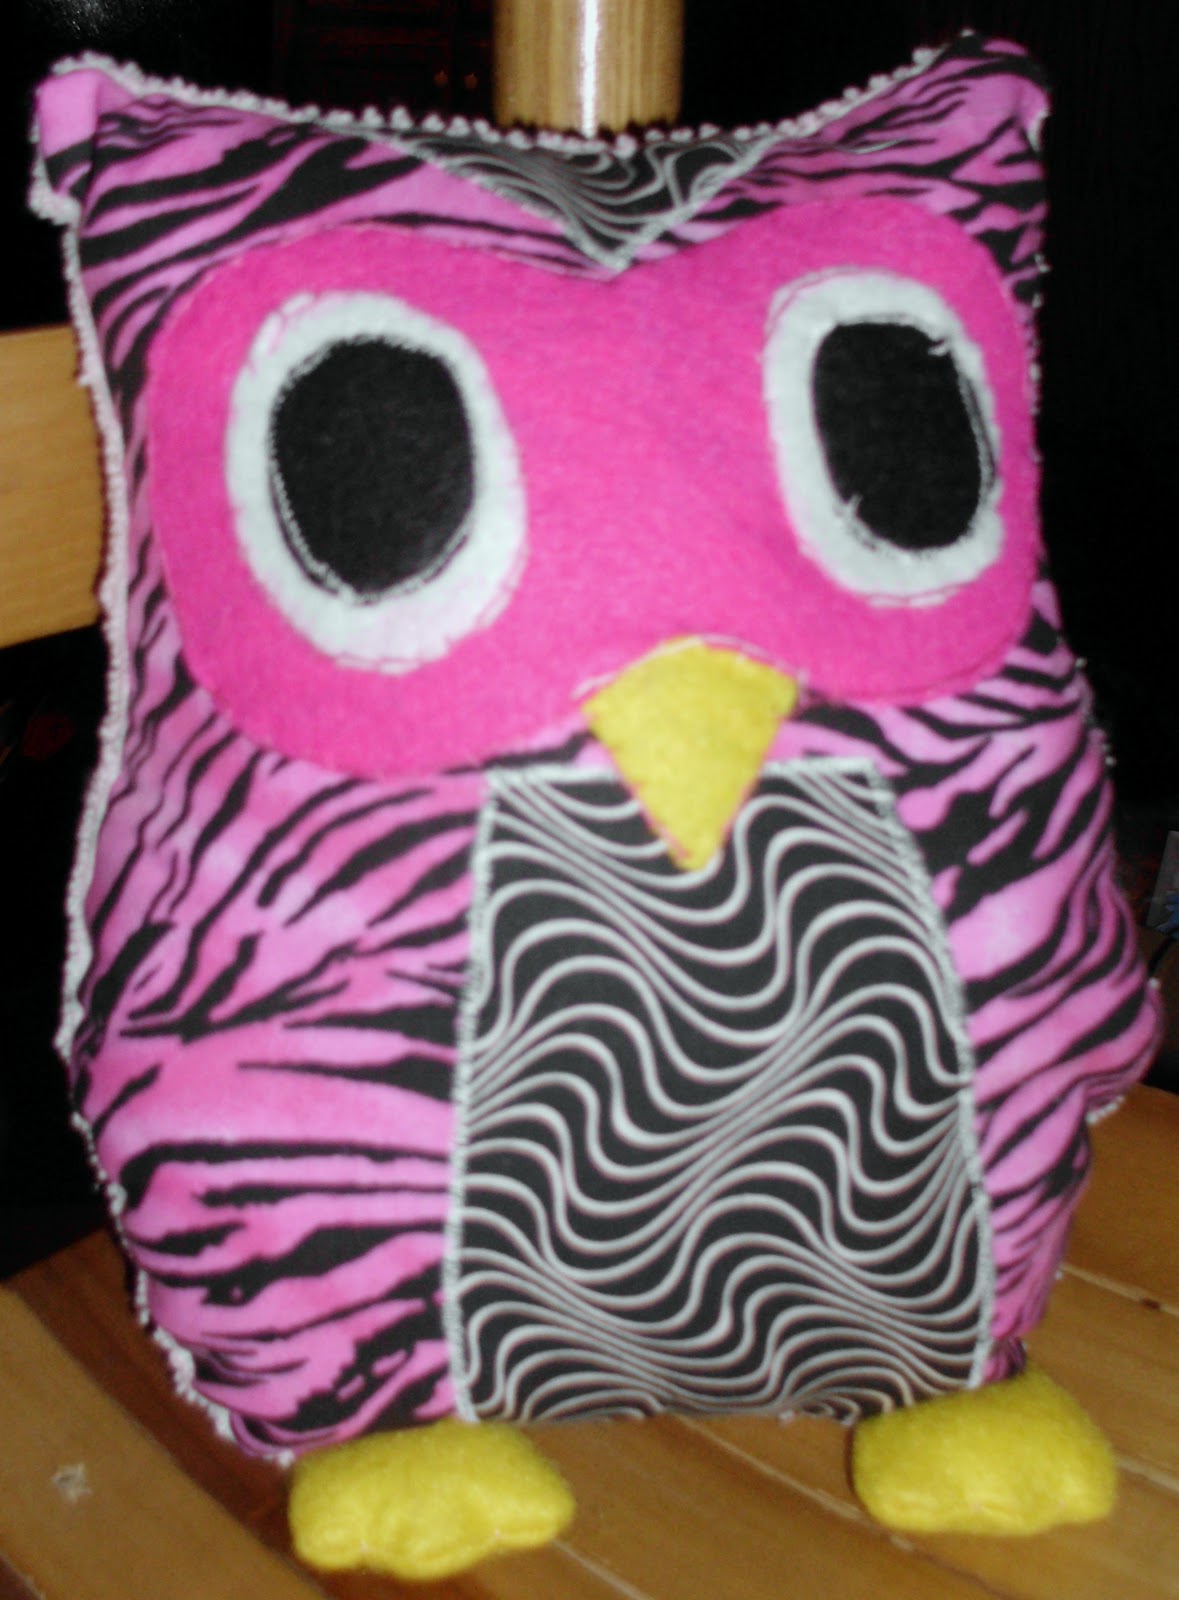
"Otis the Owl"

Meet Otis the Owl.  I made this in about one hour right before Christmas for Baby Girl.  Baby girl wanted a new comforter for her bed for Christmas.  She had several different ones picked out.  She liked the ones with peace signs, she liked the tie dyed ones, she liked the zebra print ones, and she liked the owl ones.  Well, little did she know that way back in the summer Mamaw had gotten her one and put it back for Christmas.  It was a peace sign one.  On Christmas morning we open gifts at our house before we go to Mamaw's.  So....she opened a tie dyed fleece blanket and then she got the zebra print "Otis the Owl".  She was so disapointed.  When she arrived at Mamaw's there was only one small present under the tree for her, not nearly big enough to have a comforter in it.  Little did she know that Mamaw had tucked it away in the back room to surprise her, and boy was she surprised.
To make Otis I used a pattern I found here.  I used a chenille bedspread that was no longer servicable to make the back.  I basically used the pattern and put the pillow together the way I wanted.  Thereare some things I will tweak when I make Otis again.

Thursday, December 29, 2011

Christmas


Well, now that everything has been taken down, the cookies have been made and eaten, Christmas play preformed, and Santa is resting at the North Pole, I will share with you some of our families holiday.
Pictures used for the Christmas cards.
Baby Girl in the church Christmas play "Hotel Bethleham"
Baby Girl trims the tree.

Chirstmas morning checking out the stockings.  Guess who the first youngan up was?  The 16 year old.  Still excited about the traditions of Christmas and spending time with his family.  It warms my heart.

Baby Girl tries to put Santa into a diabetic coma.  This was the plate of goodies she left for him, sugar cookies, peanutbutter balls, and red velvet cake balls.  I hope he put some of them in his pocket to take back to the elves.


Waiting for the traditonal Christmas breakfast at Mamaw and Papaw's of tenderloin, biscuits, and gravy.
Merry Christmas!!!

Tuesday, November 15, 2011

Bargin Decorating

So, I am at Lowes Hardware store looking for a new spikit (better known to people off the mountain as a faucet).  Ours had sprung a mighty powerful leak.  I didn't have much luck in the spikit department, but I did come across a real bargin on this Valspar paint.  It just happened to be the color I had been looking for.  I had bought some new furniture more than a year ago.  At the time I had a navy blue and green living room set.  It was set against my beautiful sage green walls.  Well this new set of funiture didn't have any green in it at all.  I had lived with the browns and blues against sage green back drop for over a year now.   So you can imagine how happy I was when I stumbled upon this beautiful Valspar paint with a clearance sticker on it.

   
  I don't know why this beautiful paint had been placed on the clearance rack or what caused me to stumble upon it, but it was perfect for my living room and I couldn't wait to get it home.

This paint normally sells for $30 a gallon, but this was marked $10.  I jerked it up so fast that the breeze could be felt all the way to the plumbing section

Here is a sneak peak of how it turned out.  I think it is beautiful.  I am working on some of the accessories.  They too are budget friendly.  I will keep you posted of my progress.

I love this color scheme!!!